


Every "Sewista" needs fun accessories, right?
Make them for yourself
or for someone you know who loves to sew :)
What you will need:
4mm open jump rings
7mm open jump rings
Package ear wires
lobster claw
1" piece chain with links large enough for the lobster claw
jewelry pliers
sharp craft scissors
1/16th Martha Stewart Handpunch
Phoomph by Coats & Clark (Stiff)
fabric scraps at least 1" square
co-ordinating buttons (1 for each hexie)
Fabric glue (I used Aleene's OK To Wash)
Download Hexie template

It would be best
to read through all the directions
before you begin :)
A few months back I watched a online video
for a product called Phoomph for fabric.
It's made by Coats & Clark
and it comes in either stiff or soft.
I couldn't wait to use it!
To see more about it click HERE.
I bought mine from Joann's online,
but they carry it in the store as well.
First you will need to download the hexie template.
I found it HERE. (Genius right?)
Don't forget to say "Thanks"
and leave her a lovely comment!
I printed it out full size,
then used my copier to shrink it down 50%.
Cut out your tiny hexies
Then cut the Phoomph into 1" strips
and then into 1" squares.
Peel off the paper and attach your fabric
and then peel the backside and repeat.
I didn't bother to cut my fabric into 1" squares,
I just stuck the Phoomph onto my fabric scrap
and cut around the little square.
So much easier than trying to line up
1" pieces of fabric.

Hold your paper hexie firmly
against the 1" double sided fabric square
and cut around your template.
I originally drew the shape onto the fabric,
but with these tiny shapes,
holding it in place went faster
and I ended up with better results.

For the earrings:
Use your handpunch and
punch your hole at the top "point" of the hexie.

For the bracelet:
Punch your holes along 2 opposite flat sides.

Choose your buttons
and attach them according to the directions
on the glue package.
I allowed my buttons to "cure" over night
before I went to the next step.

For the earrings:
Attach 7mm jump rings to the earrings
using the holes you made.
Use your jewelry pliers to gently close the rings.
Attach a 4mm jump ring to each 7mm jump ring
and attach an ear wire,
then gently close the 4mm jump ring
with your jewelry pliers.
You have now connected the ear wire and the hexie.
The 4mm jump ring assures
that the hexie will hang correctly in your ears.
Your earrings are done.
Stand back and admire your work :)

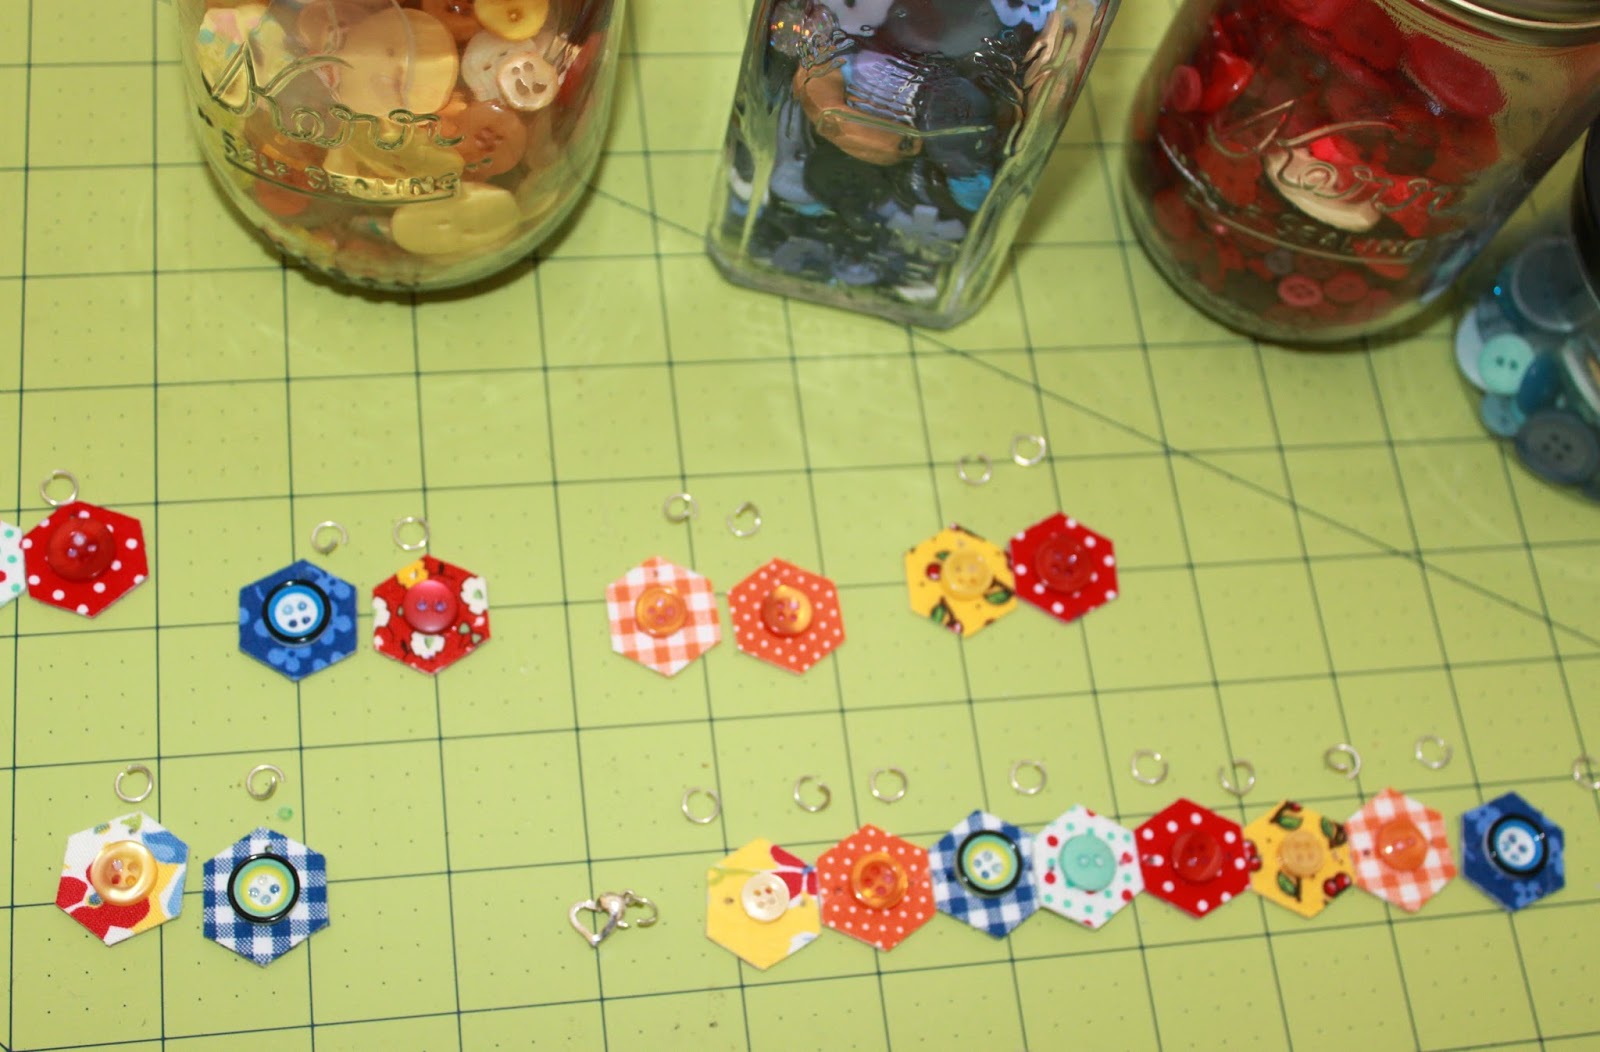
For the bracelet:
Use 7mm jump rings to attach your hexies to one another.
Use as many hexies as you need,
depending on the size of your wrist.
I have a 7" wrist and I used 9 hexies.
Gently close the rings,
leaving the first and last ring open.
Attach your lobster claw clasp to one end
and gently close that ring.

Attach the 1" piece of chain to the other end
and gently close that ring.
The chain step is optional but it gives you the ability
to extend your bracelet if necessary.
I added a bead to the end of the chain
with a straight pin and jewelry pliers.
You can also purchase an extender
at a jewelry supply store that already
has a bead or ball on the end.
If you choose not to use the extender,
you can simply close the other open ring
use your lobster claw to hook directly into it.

Your bracelet is now done.
How fun was that?
Obviously you can make necklaces as well
with maybe 5 hexies in the center
attached to chain on both sides.
So many possibilities!
I have to say,
I love me some Phoomph!


8 comments:
Thank you so much for excellent tutorial :-)! It is detailed, but simple. I think I might like to make the earrings.
girl, where is a pic of you modeling the glam wear?
Very cute and very different! Thanks for sharing!
very unique. thanks for tutorial
I have some of that phoomph and now I know what I can do with it. Thanks !
Thank you so much for excellent tutorial :-)! It is detailed, but simple. I think I might like to make the earrings.
Super cool.Thanks for sharing!
C'est vraiment une très belle idée, bravo !
Post a Comment
Thank you so much for stopping by! Your sweet comments really make my day!